The My Disney Experience (MDE) app is your vacation command center. It lets you manage everything related to your trip to Walt Disney World—including resort check-in, Lightning Lane purchases and reservations, dining, PhotoPass photos, wait times, and more.
Let’s break it all down.

Home Page Overview
The first thing you’ll see when opening the app is the Home Page. Right up top, you’ll find options for purchasing Lightning Lane passes (Single Pass, Multi-Pass, and Premier Pass). If you have a Disney Resort reservation, you’ll also see a dedicated section with your hotel details and an option to begin online check-in. You can begin the check-in process months before your actual arrival date!
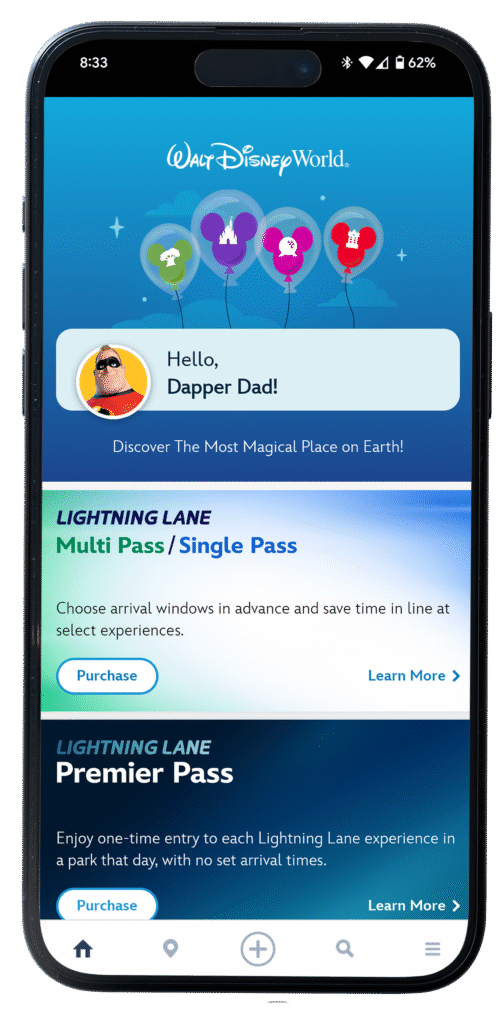

The rest of the Home Page may vary, but typically includes:
– Park hours
– Links to buy tickets for upcoming events
– Current Disney promotions
– Seasonal alerts and updates
Navigation Made Easy: The Map Tool
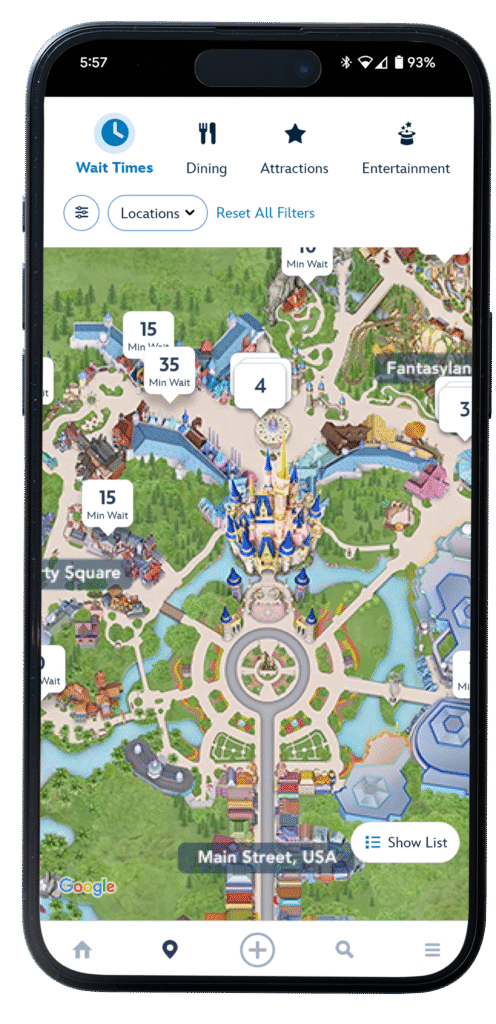
Next to the Home icon at the bottom, you’ll see the Map icon. This feature is super helpful when you’re in the parks—it shows your location, nearby attractions, restrooms, food spots, and more.
When you first open the map, it displays the area around you along with live wait times for nearby rides. Use the filter at the top to toggle what you want to see (e.g., dining, character meets, restrooms, transportation, etc.).
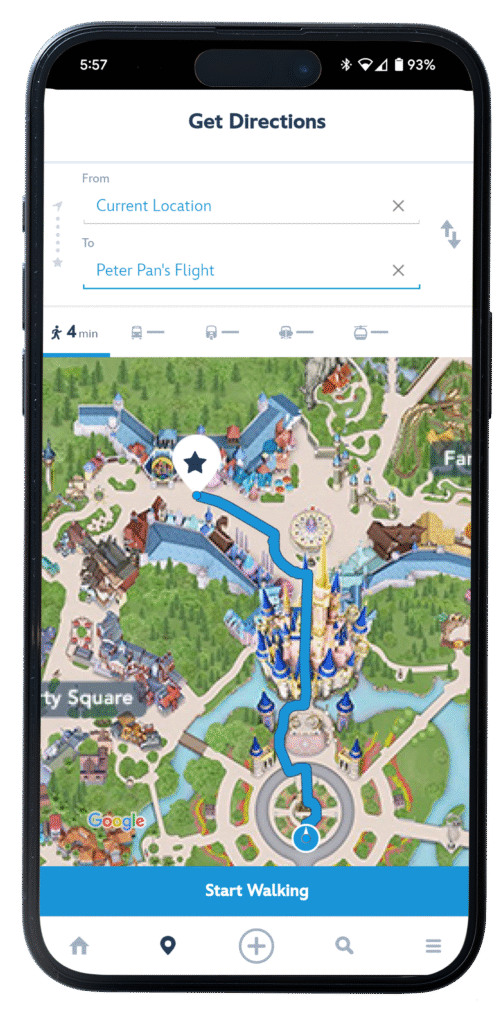
Tap on any icon to open a detailed info page, complete with:
– Current wait time
– A button for step-by-step directions from your location
– Mobile ordering shortcuts for dining locations’
Menu Page Highlights
Now for the real magic: tap the Menu icon (☰) in the bottom right corner.
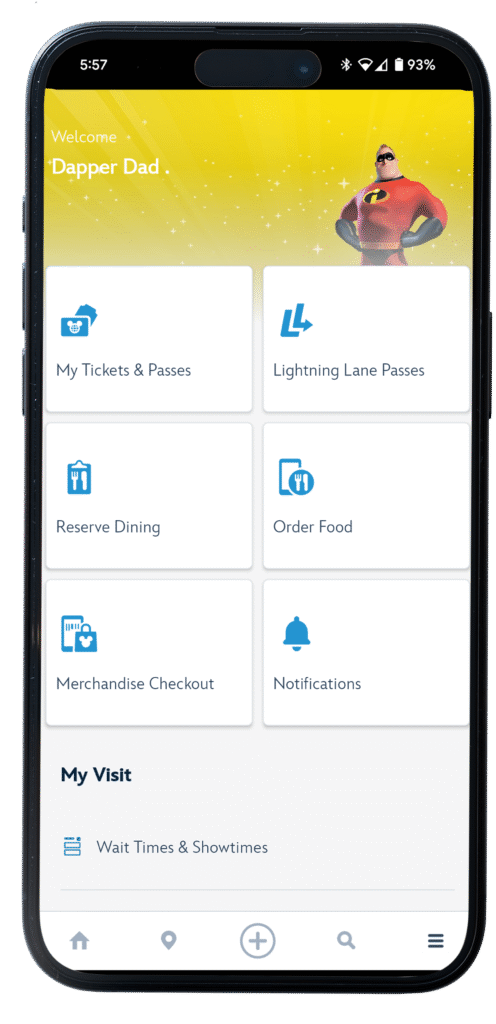
At the top of the Menu, you’ll find quick access tiles for:
– Tickets & Lightning Lane passes
– Dining reservations
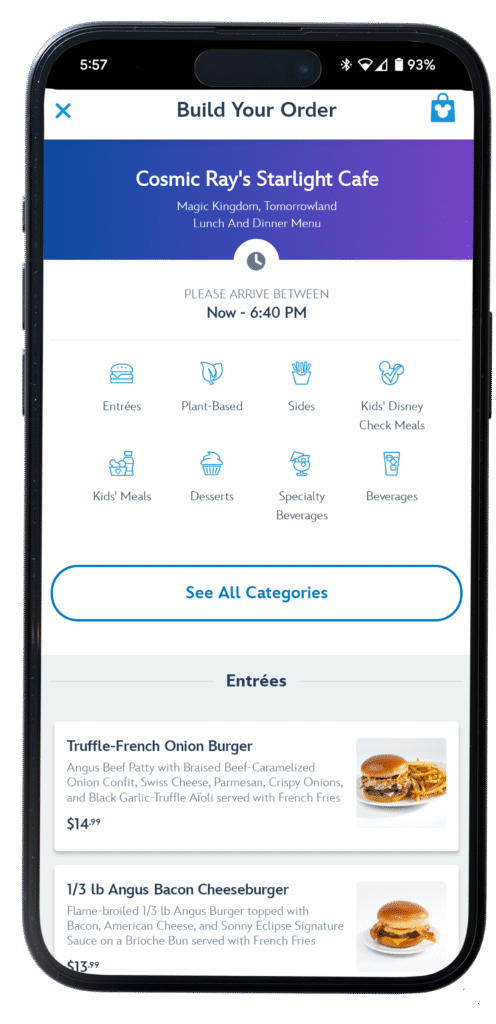
– Mobile food ordering
– Merchandise checkout (works at most shops—including major locations in the parks and Disney Springs)
Pro Tip: Mobile order is a must. Skip the counter lines—find a seat in the A/C, order from your phone, and relax. You’ll get a notification when your food is ready, along with the pickup window.
⚠️ Just be sure to check the estimated pickup time before you place your order. During peak hours, waits can be longer.
Wait Times, Genie & the Tip Board
Scroll down the Menu page to the My Visit section. Here you’ll find the tools that truly make your day easier, including what is probably the most popular page in the app, ‘Wait Times & Showtimes’. On this page, there are two tabs:
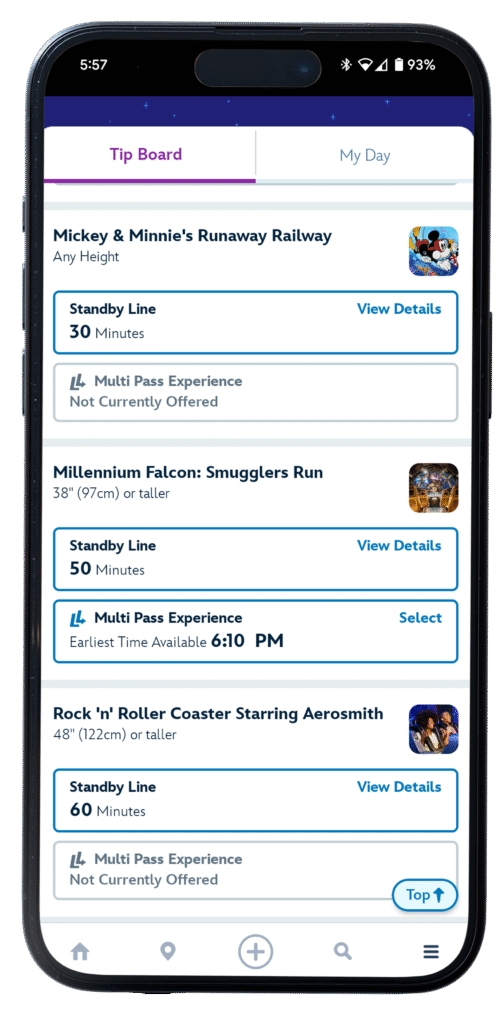
Tip Board
– See wait times for every attraction and show
– View (and select, if eligible) Lightning Lane availability
– Filter by park and ride
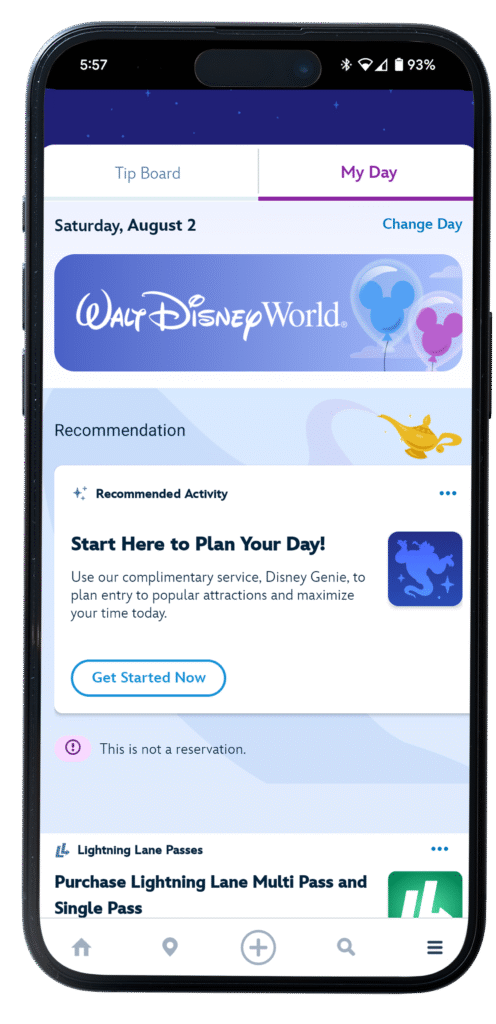
My Day
Use the free Disney Genie planning tool. Just select:
– The park you’re visiting
– Your party members
– Your top attractions and interests
Genie will generate a suggested itinerary tailored to your group and park schedule.
Pro Tip: Start with a plan—but expect to pivot. Weather, attraction closures, and family fatigue are all part of the Disney experience, albeit the most unpleasant parts. Stay flexible, take A/C breaks in shops or restrooms (sounds silly, but it can be an oasis!), grab a snack, or even head back to your resort for a mid-day recharge. Roll with these punches and I promise you it will make your day much more enjoyable.
PhotoPass & Memory Maker
Still in the Menu, head to Disney PhotoPass to view all your linked ride photos and those taken by Disney photographers.
Here’s how it works:
– Ride photos: Tap your MagicBand, ticket, or phone after the ride to link them.
– Photographer shots: After snapping your pics, they’ll tap your device to link the images.
Photos usually show up in the app within 10–15 minutes. If they don’t, visit a photographer or a Guest Experience cast member for help.
Memory Maker
– $75 — One Day
– $210 — Entire Trip (or $185 if purchased 3+ days in advance)
– LL Multi-Pass includes ride photos automatically
My family always gets Memory Maker. We love sharing photos on social and making albums with the kids when we get home.
Managing Your Profile & MagicBands
At the bottom of the Menu page, you’ll find several more tools, but I’ll touch on two of the more helpful ones here:
Profile:
– Link memberships (Disney+, D23, Disney Cruise Line, etc.).
– Add or manage friends and family.
– Link park tickets and hotel reservations.
MagicBands & Cards:
– Connect new MagicBands or ticket cards to your profile.
– Be sure your group is linked—this makes it easy to book Lightning Lanes for the whole party at once.
If you’re managing your family’s vacation (aka, you’re the planner), keeping this area organized is a huge timesaver.
Wrapping Up
The My Disney Experience app is the heartbeat of your trip. From navigating the parks to managing your ride reservations, dining, photos, and more—it’s the single most important tool you’ll have in your pocket.
Still have questions about using the app or planning your first visit? Drop them in the comments—I’d love to help.
See ya real soon!
– DD
Trackbacks/Pingbacks